
Chocolate isn’t just for satisfying your sweet tooth; it’s the key ingredient to countless kitchen masterpieces. Knowing how to handle it can really elevate your game. Whether you’re thinking about baking, crafting some fancy candies, or just adding a drizzle on your ice cream, melted chocolate can work wonders.
Before diving into techniques, let’s chat about what’s actually in chocolate. At its core, it’s mostly cocoa solids, cocoa butter, sugar, and milk solids (yeah, that’s for the milk chocolate lovers). Each part adds to the flavor and texture, but they also play a role in how it melts.
So why even bother with the fuss of melting? Well, melted chocolate gives you that super smooth, glossy finish that looks gorgeous and tastes even better. Whether you’re looking to coat some truffles or write a fancy note on a cake, melting is your go-to.
Here’s where things get a bit tricky – chocolate is awfully sensitive to heat. Crank up the temperature too much or too fast, and it can scorch, turning your chocolate grainy and sad. That’s the last thing we want. Understanding this just makes you better at handling it without the stress of ending up with a burnt mess.
Melting Chocolate: Stove or Microwave?
Figuring out how to melt chocolate depends on what you’ve got available and how comfortable you are in the kitchen. What’s the best way to melt chocolate without turning it into a crispy disaster? Let’s break it down.
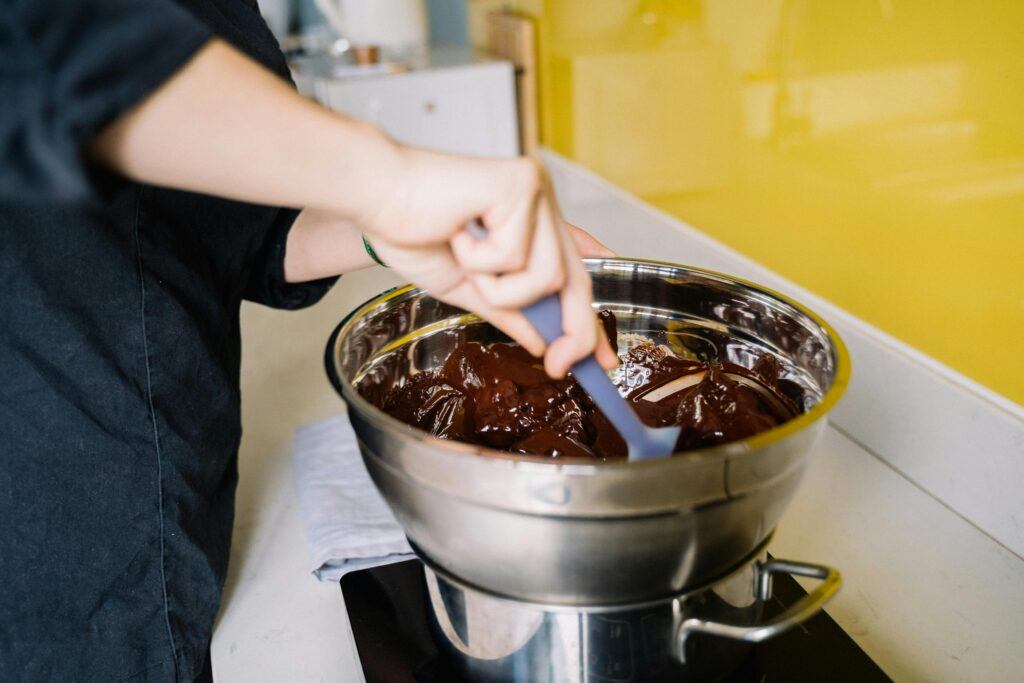
When you want control and results that are easy to predict, the double boiler is your buddy. It involves setting a heatproof bowl over a pot of simmering water. The indirect heat gently warms your chocolate, giving you time to react before any burning happens. It’s a classic for a reason.
Meanwhile, the microwave’s all about speed. You pop your chocolate in a microwave-safe bowl and nuke it in short bursts, stirring in between. It’s faster, sure, but you need to stay sharp to avoid overheating. Chocolate in a microwave can quickly go from perfect to ruined if left unattended, so keep an eye out.
To help decide, consider what you prefer: time efficiency or having more control. For large batches or a slow-and-steady kind of day, stick with the stove. For a quick fix with a smaller batch, the microwave might be your best bet.
If you’re in a situation where you’re trying to choose between methods, think about the kind of chocolate you’re using too. Milk chocolate and white chocolate are more temperamental than dark chocolate because they’ve got more milk solids, so handle them with extra care regardless of the method you pick.
Enhancing Melting: Butter, Oil, Glass, or Plastic?
Preparing melted chocolate to perfection often involves choosing some helpers. Ever wondered if you should add a bit of butter or oil to your chocolate? Well, adding a little fat can make your melted concoction creamier and more manageable, especially if you’re planning to dip fruits or make a sauce.
Butter gives your chocolate a richer, fuller flavor and adds a luxurious texture to your creations. If you’re after a glossy finish, a touch of oil (like coconut or vegetable oil) can also do the trick. Keep in mind, though, each choice might slightly tweak the taste or consistency, so think about the final dish before picking.
Onto the next burning question — should you be melting chocolate in glass or plastic? Here’s the scoop. Glass bowls distribute heat evenly, so they’re a great choice for stovetop melting. You won’t have to worry about hot spots that might burn your chocolate. Plus, glass retains warmth longer, so the chocolate stays melty as you work.
Plastic bowls can work, especially in the microwave, but they’re not created equal. Some plastics might warp or not handle heat well. Always opt for microwave-safe versions if you’re going that route. Also, plastic might cool down faster, causing your chocolate to harden sooner than you’d like.
When choosing your bowl, think about the size of your batch. Go for something big enough to let you stir without making a mess, and always dry your bowl thoroughly before starting. Water is chocolate’s worst enemy when it comes to melting, leading to lumps and a gritty texture.
Common Mistakes and How to Avoid Them
When it comes to melting chocolate like a boss, avoiding common pitfalls can save you time and frustration. One major slip-up folks make is introducing moisture. Even a tiny drop of water can make your chocolate seize up, turning it into a lumpy mess. The solution? Always dry everything completely—hands, bowls, spoons—before getting started.
Another common mistake is overheating. This one’s equal parts easy and fixable though. Always melt chocolate low and slow. If it’s on the stove, keep that water simmering gently in your double boiler. In the microwave, use short bursts, stopping to stir frequently. Even when it looks almost ready, give it a stir—it often just needs a little help along the way.
If your chocolate does seize or clump, don’t throw in the towel just yet! Try adding a small amount of warm water, cream, or even a pat of butter to smooth things out again, stirring gently until it comes back together. With enough patience and care, seized chocolate can often be salvaged.
FAQs often pop up when beginners are navigating the world of melted chocolate. How do you keep it warm while working? An easy trick is to place your bowl over warm but not simmering water to retain its texture without cooking further.
Home chefs aiming for professional results don’t need fancy gear. All you really need is patience, a watchful eye, and a gentle touch. Following these steps will have you melting chocolate smoothly and confidently. Once you’re comfortable, you can add your flair—flavored oils, extracts, or even a splash of your favorite booze for a unique twist.